How to: Use textures in Multiple Exposure Photography

Multiple Exposure Photography Image (out of camera) from RHS Bridgewater
What are textures?
I guess we should start by looking at that question, and it’s quite a simple answer really. I would describe them as a layer which gives a 3D feel to an image, most of them look a little ‘painterly’ after you have finished with them. I do use them in different ways but the overarching reason is to knit together an image that has been produced out of camera. In camera multiple exposure images, as they are blended by the camera, tend to be quite cohesive with all of the components blending to produce ‘a whole’. When you are blending out of camera you have to make those calls about the nature of your image and sometimes, as above, to get all of the colour combinations working together a layer of texture works well.
Getting layers of texture into photoshop with the image(s) you want to use can mean that you put both raw files into the ‘quick collection’ which will enable you to select them together and add them as layers as I mentioned in the previous blog: How to create Multiple Exposure Images ‘In the Round’ style. If you are ok with working with your texture in jpeg, as I am, you can have a folder of them on your desktop and simply drag and drop it onto the image you are working with.
Sometimes I just change the fill or opacity of the texture layer and sometimes I put the texture through a blend mode (usually overlay to begin with), and sometimes I might do both!
The types of images that you can use for texture range from stone work to carpets and some of them work better than others. There’s no real recipe for one producing the effect you want but if the image looks ‘scratchy’ it will probably work well. Some examples of some of my favourite textures are below: L-R, top-bottom; a wall, a painted internal wall, a caret (at the British museum!), a wall with lichen on it, the top of my old microwave, a canvas with paint on it.


How do you use textures with Multiple Exposure images of flowers?
Flowers are so delicate if you take them in macro that often you don’t want to disturb the image by adding in too much extra detail, enabling the petals to take their glory. I think a texture can often work really well here to take the flower out of the background even more, so it is the star of the show. The cowslip below is an example of this - in fact it has 2 textures on it that produce different effects.
The buds of the second image - this in itself is a multiple exposure of 3 images of those buds together - are enhanced by the texture of the extra layer of paint. It brings out the colour, which wasn’t quite that lovely dusky pink.
The last image is of the humble daisy and it’s an out of camera multiple exposure with 3 layers of the flower itself. The texture masks any pesky piece of grass that may be more in focus than you would like, you now don’t have to clone it out as well - bonus.

A Multiple Exposure Imagecreated from the simple, but majestic, cowslip

Flower buds from RHS Bridgewater

A Multiple Exposure Image of a daisy from my garden!
How do you use textures in Multiple Exposure images of Architecture (inside and out)?
I do love a bit of architecture and Birmingham is a veritable feast of buildings for photographic exploration, both inside and out - I do a lot of in camera work there which I bring back into photoshop when I return home - If you are interested then please do look at my in camera in person workshop that I am doing on the 17th August (and other dates if you are reading this later on!) Click here for the details HERE
Anyway, the first image is an in camera multiple exposure of the town hall and it is brough together with the texture as otherwise there are too many details.
Second you can see that the inside of the Selfridges building is overlaid with those magnificent dots of the outside of the building. The white paint layer I have applied here is subtle but it just brings those two layers together in a more cohesive image overall.
Lastly, the inside of the library - which I couldn’t get straight as it’s circular - has a texture of the stone work in the square from outside which enables a deepening of the colours and an overall more atmospheric image.

A Multiple Exposure Photography Image of the town hall, Birmingham

A Multiple Exposure Image of the Selfridges Building - inside and out

A Multiple Exposure Image of the inside of Birmingham library
How do you use textures in Multiple Exposure Photography to create a more painterly image?
Whereas I hate the word painterly with a passion, that is what I mean by this set of images. I was pleased with the in camera multiple exposure of the flamingos (one in focus, one out) but with the application of the white paint texture it blurs those background flamingos even more and enables the one at the forefront to stand out even more.
The second is a scene from Crosby beach which was ok without a texture but with the texture does show off the scene to it’s full detail without waves in the sea or clouds in the sky ‘getting in the way’ It has made a huge difference to how I view this image.
The last is the ‘moles view’ where I have combined a layer showing the leaves with a layer of tree. The texture just binds these two layers together and gives it much more of a cohesive feel, whilst also making some of those leaves in the sky funky which is a massive bonus!
As usual if you like these images then do have a look in THE GALLERY for more ideas - or in fact any of the other blogs - and do visit my COURSES PAGE for a chance to work on your ideas with me, I would love to meet you!
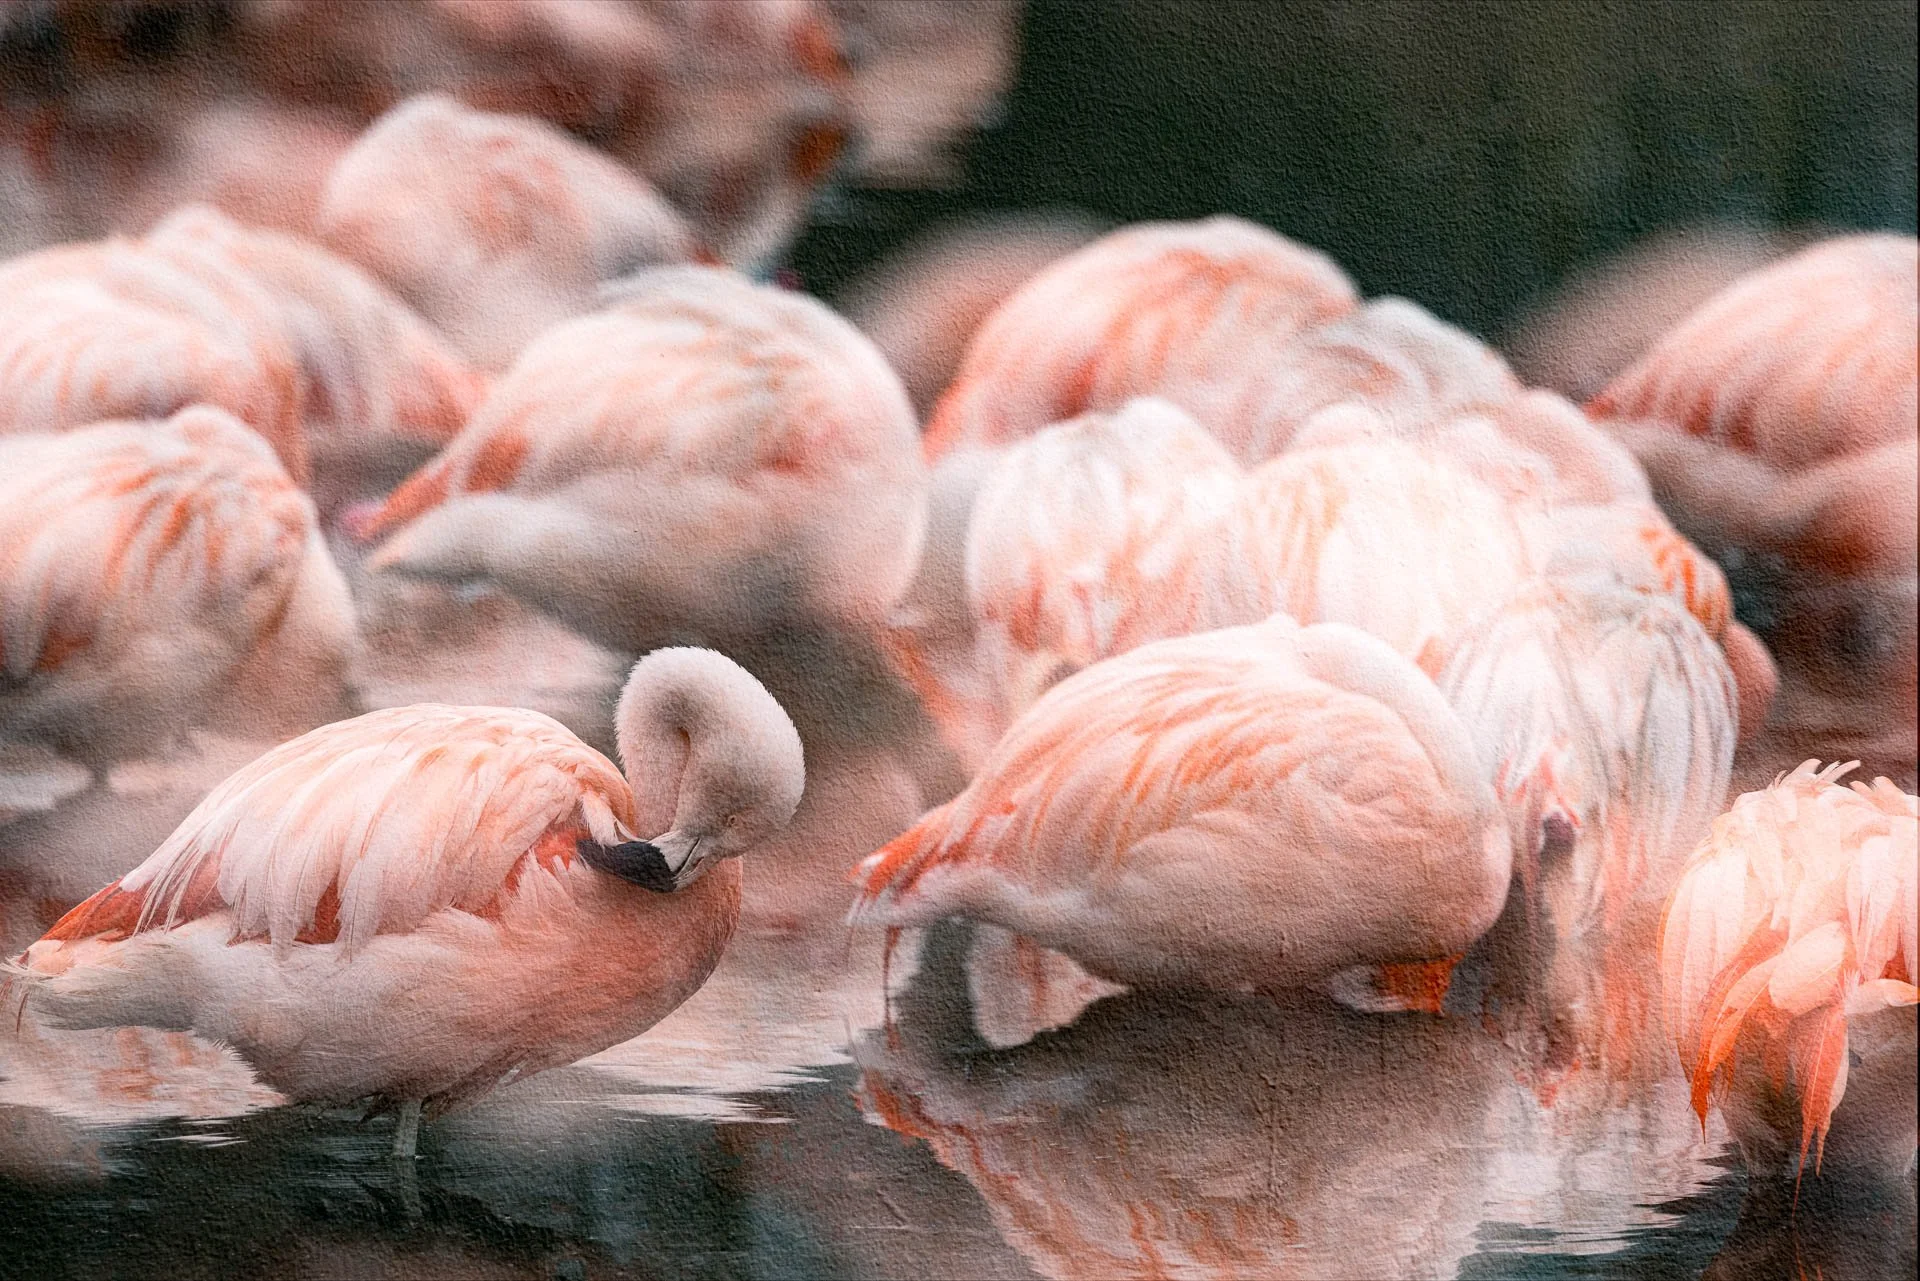
A Multiple Exposure Image of flamingos from Martin Mere Wetlands Centre

A Multiple Exposure Image of Crosby beach

A Multiple Exposure Image from Brown Moss - a small nature reserve in Shropshire