Inspirations: Try a little Self Portraiture in your Multiple Exposures
Multiple Exposure Photography image using self portraiture
There’s something fascinating about turning the camera towards ourselves. A self-portrait isn’t just a record of how we look — it’s a reflection of who we are, what we feel, and the stories we want to tell. Add multiple exposure into the mix, and suddenly the possibilities for self-expression become endless.
Multiple exposure photography allows us to layer images, merging them into something entirely new. When used for self-portraits, this technique becomes incredibly personal: a way to capture not just you - but your mood, your passions, even your inner world. I, like most photographers dislike being the other side of the camera but feeling inspired by the amazing Brooke Shaden I wanted to give it a go. I had previously experimented with images like the one below which is an in camera multiple exposure of me in a mirror and then putting that image into one of the circles from the Selfridges building in Birmingham which I guess I would probably call a selfie rather than a self portrait!
Unlike traditional portraits, multiple exposure gives you freedom from literal representation. You’re no longer confined to a straightforward image of yourself; instead, you can create an artwork that blends your portrait with symbolic textures, shapes, or scenes. It’s about painting with the camera, rather than simply recording.
Creative Expression: Combine your silhouette with patterns, foliage, or architecture to reveal different sides of yourself.
Emotional Storytelling: Overlay calm waves or stormy skies to reflect inner emotions.
Playfulness: Experiment with layering gestures, profiles, or movements to create surreal and dreamlike images.
Uniqueness: Each multiple exposure is unrepeatable, making your self-portrait entirely your own.
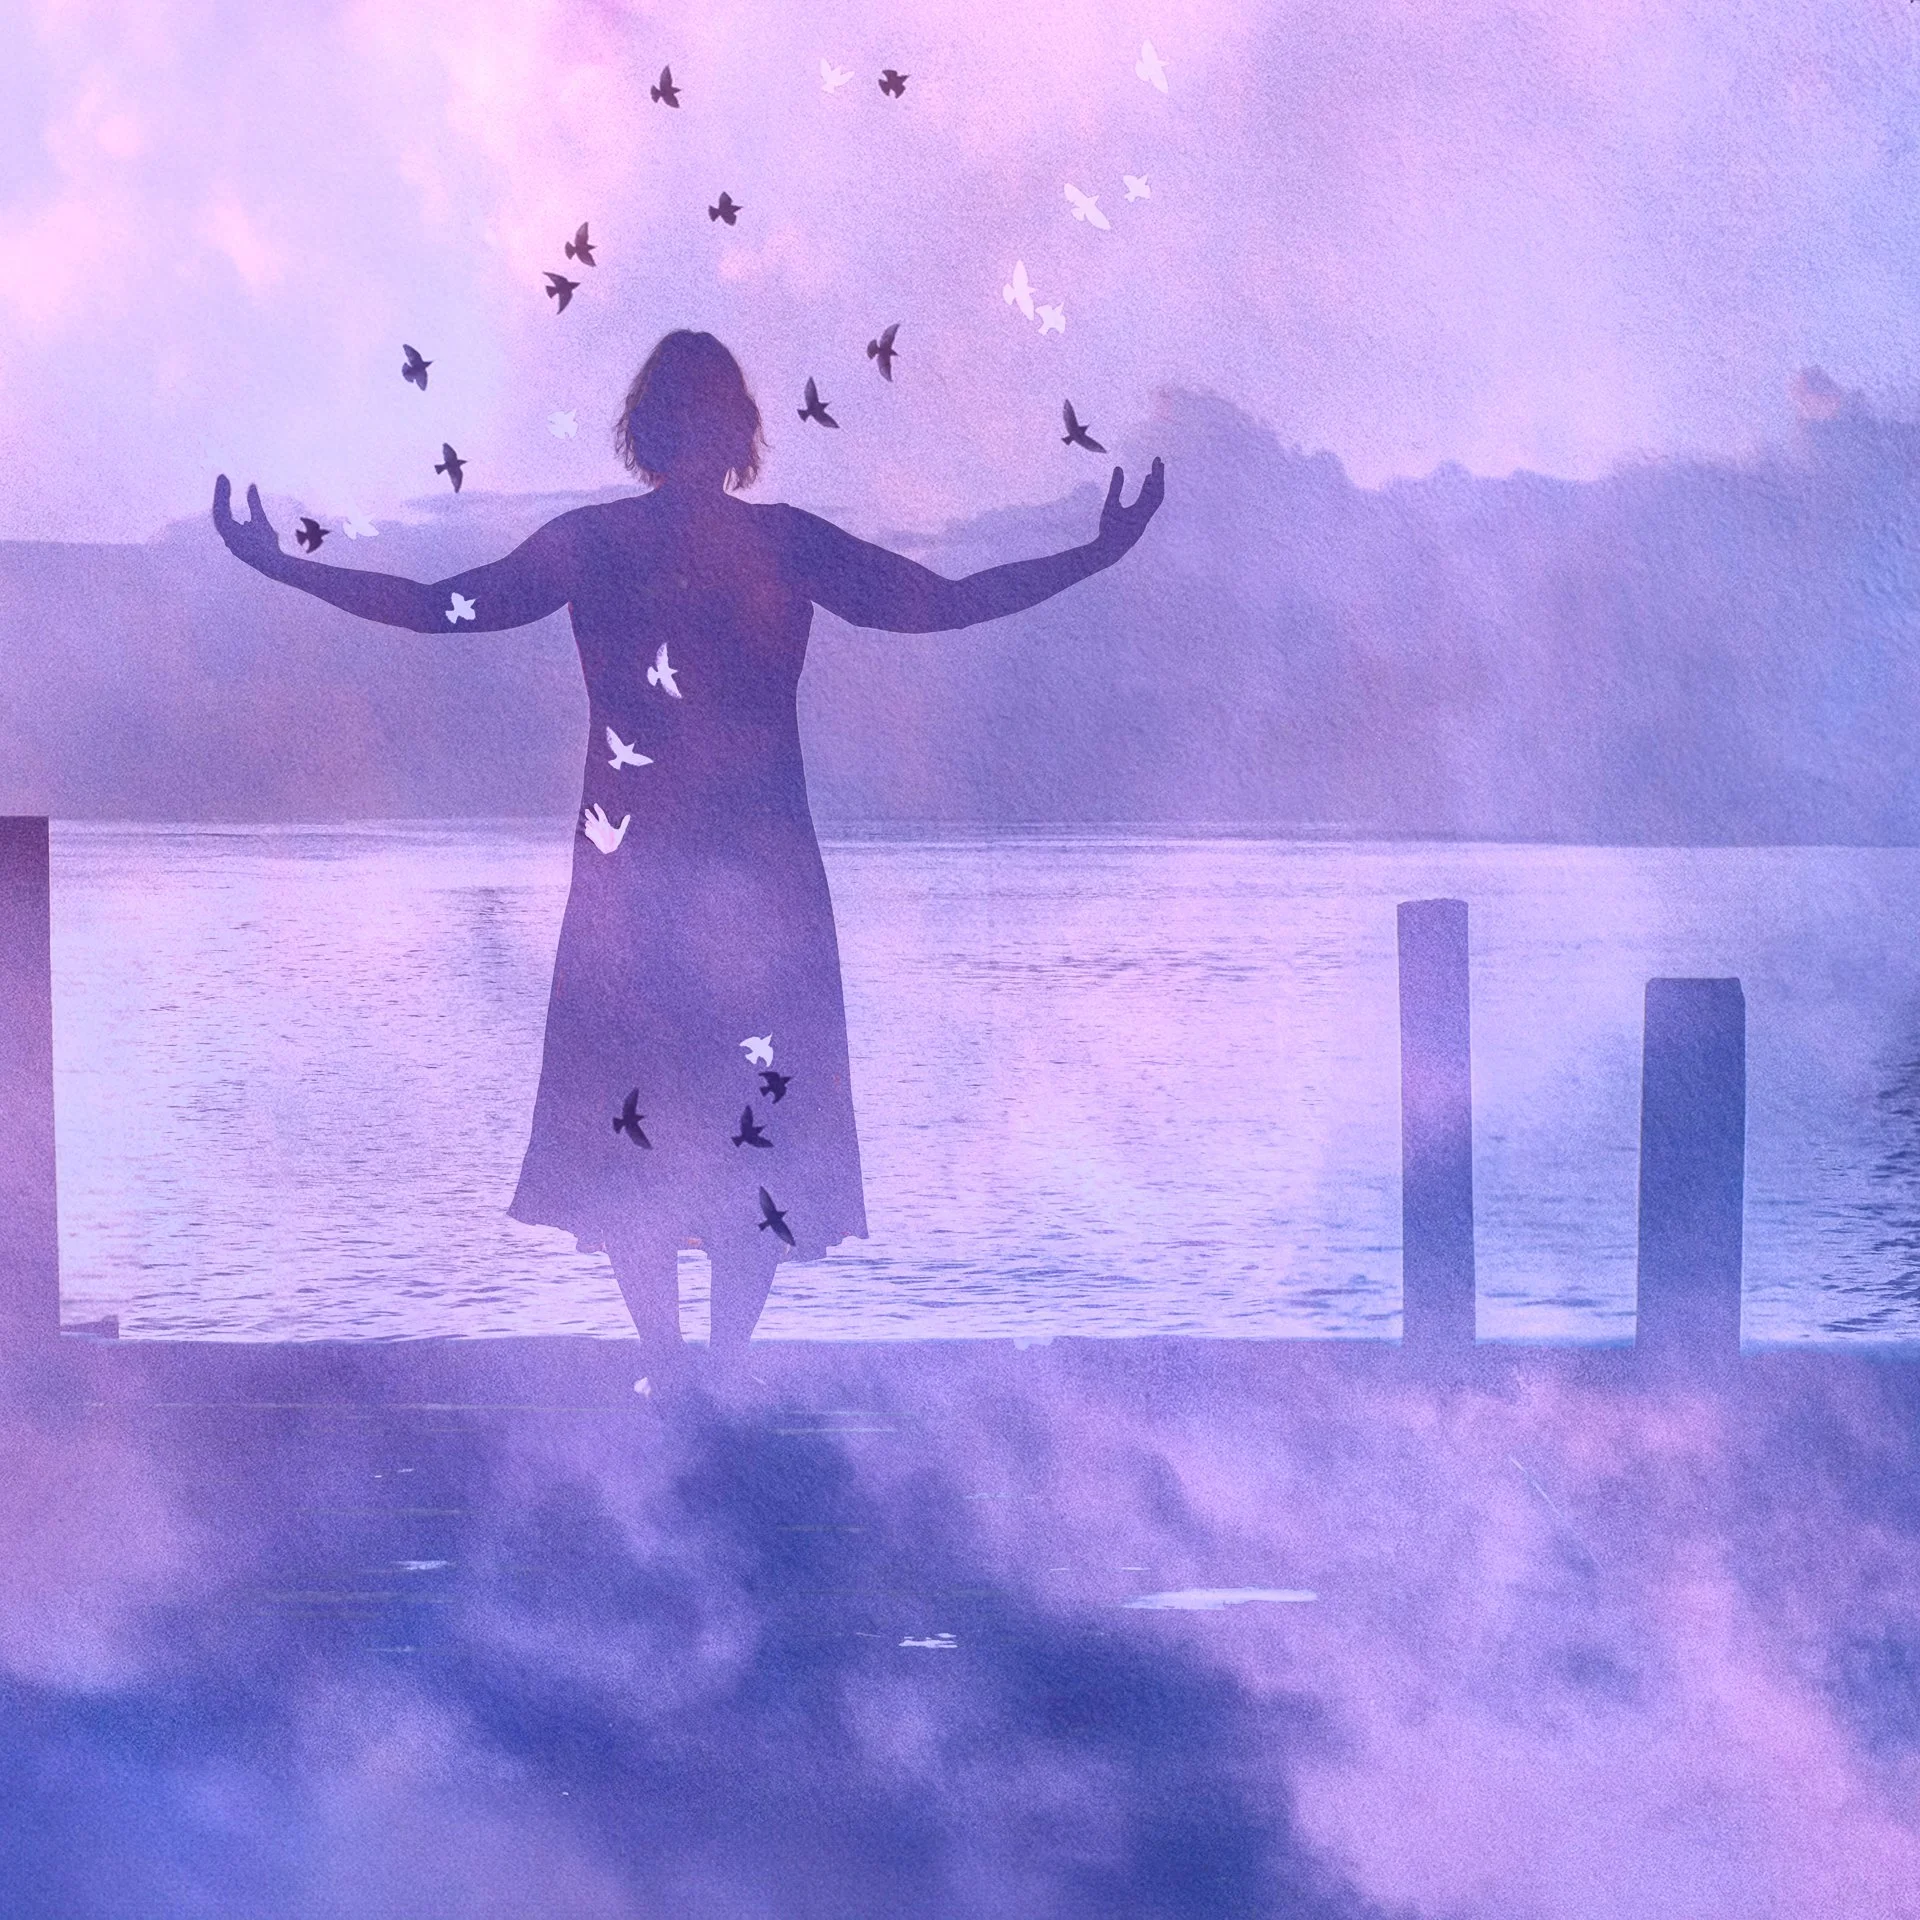
The image above is where I used a self portrait taken on my camera and then in photoshop added exposures of sunset clouds and birds in order to create an image that I thought summed up my multiple exposure style. It’s kinda like I am calling to the birds which I can then put on lots of my images!

Multiple Exposure Photography image using self portraiture
One of the challenges of self-portrait photography is, of course, that you’re both the photographer and the subject. But with a little preparation, it becomes a playful and creative process. Here’s how to get started:
1. Choose your location and background
Think about the story you want your image to tell. A plain wall, an open landscape, or a silhouetted structure (like a pergola or arch) can all provide strong shapes that work beautifully when layered with textures and colours. I found that I spent a lot of time with the image of just me useing the erase tool in lightroom. I would definitely recommend thinking about the background or keeping it very plain.
2. Use a tripod
A tripod is your best friend here. It keeps your framing steady and allows you to move in and out of the scene without worrying about camera shake. I hate tripods and mine broke just before I was trying to take these shots. I used a handy post and straightened up in post processing…..Next time however I will definitely be using the tripod. Set up your camera and focus on where you will be - this may take a while so don’t do this anywhere really busy!
3. Trigger the shutter remotely
You’ve got options: a remote release, a phone app (many cameras have one), or the simple self-timer. If you’re using a timer, give yourself enough seconds to walk into position and settle. I chose to do my self portraits when I was on holiday in St Lucia so there would be evening light and I would still be able to wear the dress I wanted without freezing to death!
4. Pay attention to light
Light will shape your self-portrait. Backlighting is wonderful for creating silhouettes, while softer side lighting is perfect if you want detail in your features. For multiple exposure, silhouettes can be especially effective because they act almost like a canvas for the second image. I didn’t want to show myself looking ‘normal’ so I adjusted the lighting and poses to reflect that.
5. Pose with intention
Since you won’t be behind the lens to see yourself, think about poses that express movement or emotion clearly. Extending your arms, tilting your head, or bending at the waist all create striking lines that layer well. Don’t be afraid to exaggerate — subtle expressions often get lost in this medium. Now this was the fun bit - especially as I chose a nice quiet spot, I can imagine it may make you feel self conscious if you have lots of people around whilst you are creating your poses. Or maybe it wouldn’t!

Multiple Exposure Photography image using self portraiture
The image above takes a softer approach. The figure, pale and almost ghost-like, seems to merge with the water and the textured sky. There’s a feeling of vulnerability here, but also openness — as if the subject is dissolving into the natural world, becoming part of something larger. I wanted the cloud to be a part of the image and I took an image I wanted to pair with my portrait but it wasn’t quite the right size so I ran with it and went in a different creative direction. The colour comes from using the ‘difference’ mode which turned me a grey colour and the pink cloud into cyan. This also has a layer of white paint over the top at add a texture to it.

Multiple Exposure Photography image using self portraiture
The third image shifts into bold, emotional territory. Deep magentas and blues wrap around the figure, creating a dramatic stage for introspection. With the head bowed and hands reaching down, the posture conveys reflection or surrender, while the colours pulse with energy and emotion. This one also shows different markings on my arms - this was actually a happy accident and happened during post processing when I was removing objects in the background. I suppose all that time I spent removing then did have some advantages. This image has several sunset skies and white paint over the top.
The last image below, the strong silhouette of the figure beneath a structure is overlaid with the warmth of a sunset sky and textured tones. The contrast between the dark frame and the glowing colours suggests both strength and serenity — a balance between holding space and letting the light pour through. I also think it portrays trying to hold on to life as it whizzes past at an alarming speed! This showcases the use of a pergola and how powerful that can be for your images. It has an ICM layer and a yellow wall to create the background.

Multiple Exposure Photography image using self portraiture
I’d love to hear what you think — have you ever tried creating self-portraits with multiple exposure? Why not give it a go and see what unfolds? It’s such a rewarding way to explore creativity, identity, and emotion all in one frame.
If you are inspired, please drop a comment below, and even better — share some of your images on the Multiple Exposure hub on Facebook. It’s always inspiring to see how different photographers interpret the same technique in their own unique way.
These images were created as part of my Inspired by the Photographers course, but there are many other workshops and courses for you to explore if you’d like to dive deeper. If you still have reservations of being in front of the camera yourself then maybe have a look at the Multiple Exposure Portraits short course to see what you can do with other people in front of your lens. And if post-processing multiple exposures is something that excites you, head over to my courses section and have a browse. There’s a whole world of creative possibility waiting for you.